*This is a post I wrote several months back on my personal blog but I thought I would share it here today since it is the season for wrapping!
It was my first attempt at decorating my own wrapping paper and I discovered a few things that worked and some that didn’t. I’ll let you be the judge in deciding how it turned out….
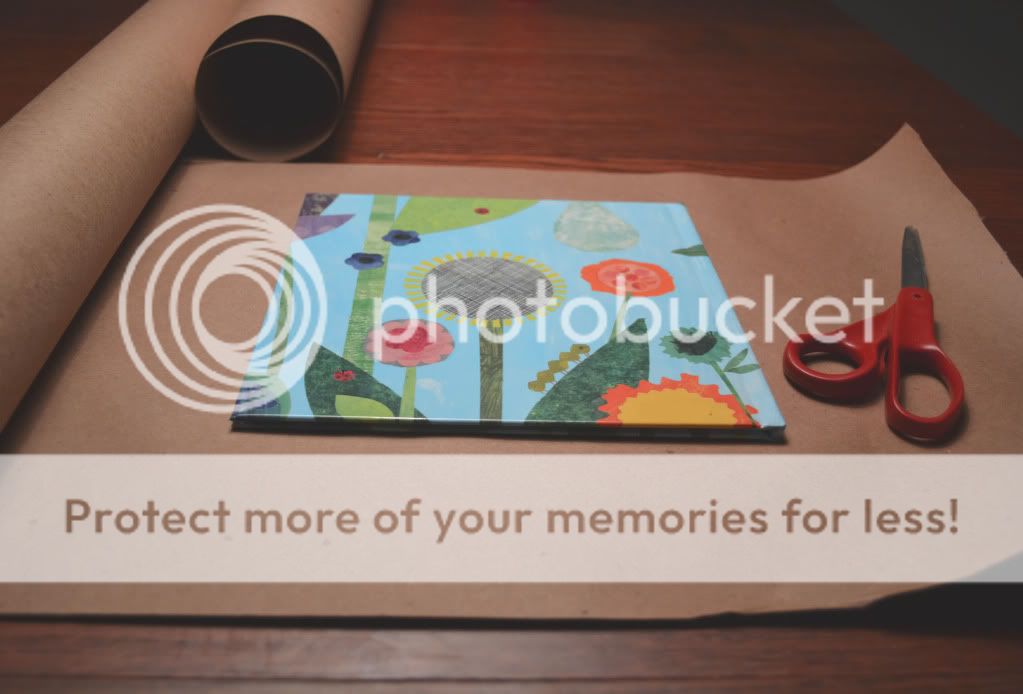
Step #1: Measure wrapping paper (in this case I am using a large roll of brown drawing paper I had from college and recently unearthed in my parents garage). Score! You can get yours here.
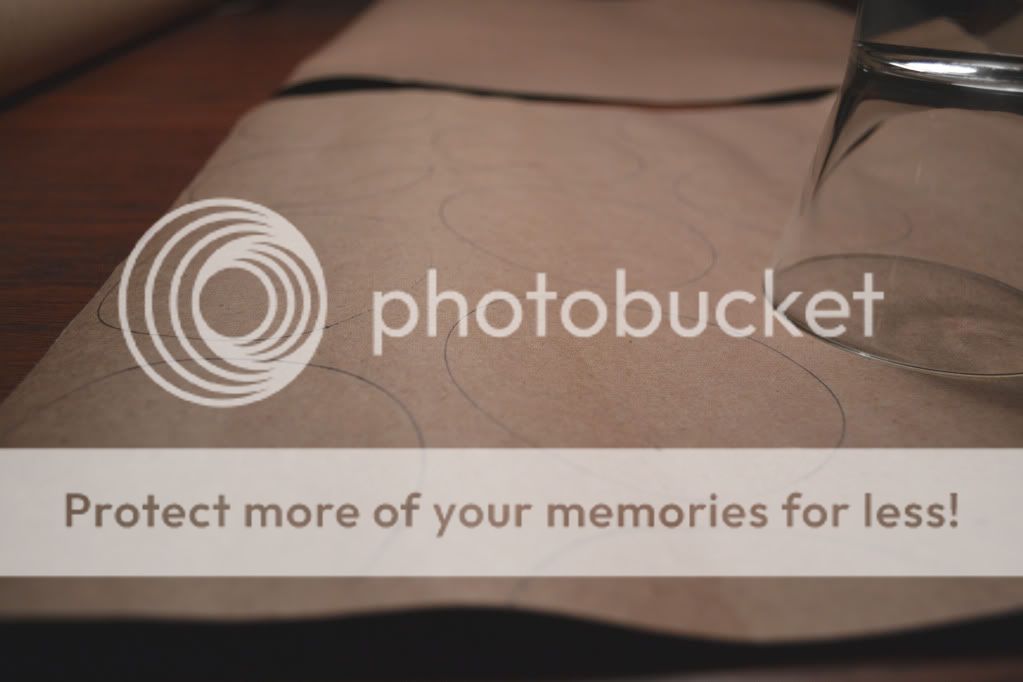
Step #2: Take a glass (or any round top object will do) and draw circles on another sheet of paper the same or similar size as the one you will be wrapping with…
Step #3: Cut out circles and place them by taping on wrapping paper surface…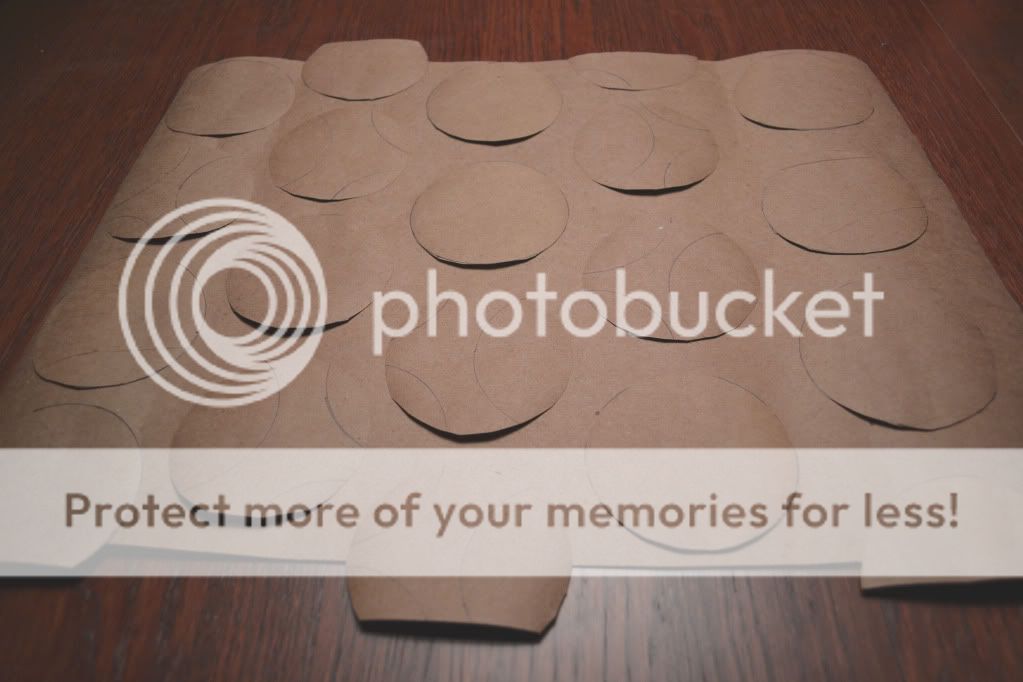
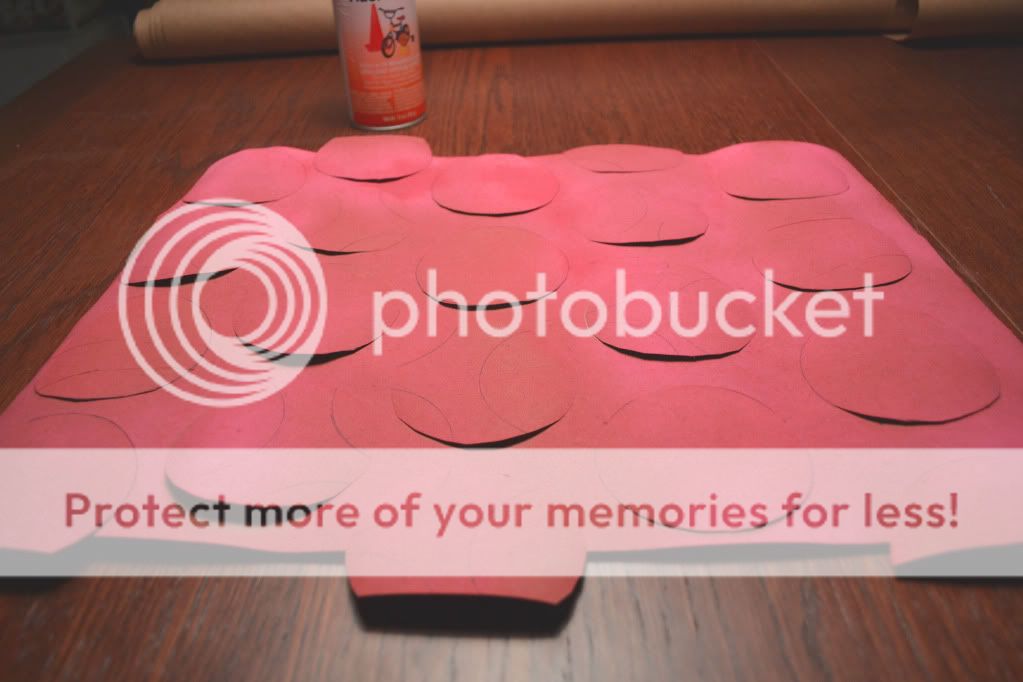
Step #4: Choose desired color of spray paint and coat wrapping paper with circles still taped in place. I used pink here but red or white would be perfect for the Holidays!
Step #5: Remove cutout circles…

Step #6: Wrap gift and use ribbon, or in this case yarn, to tie a bow…
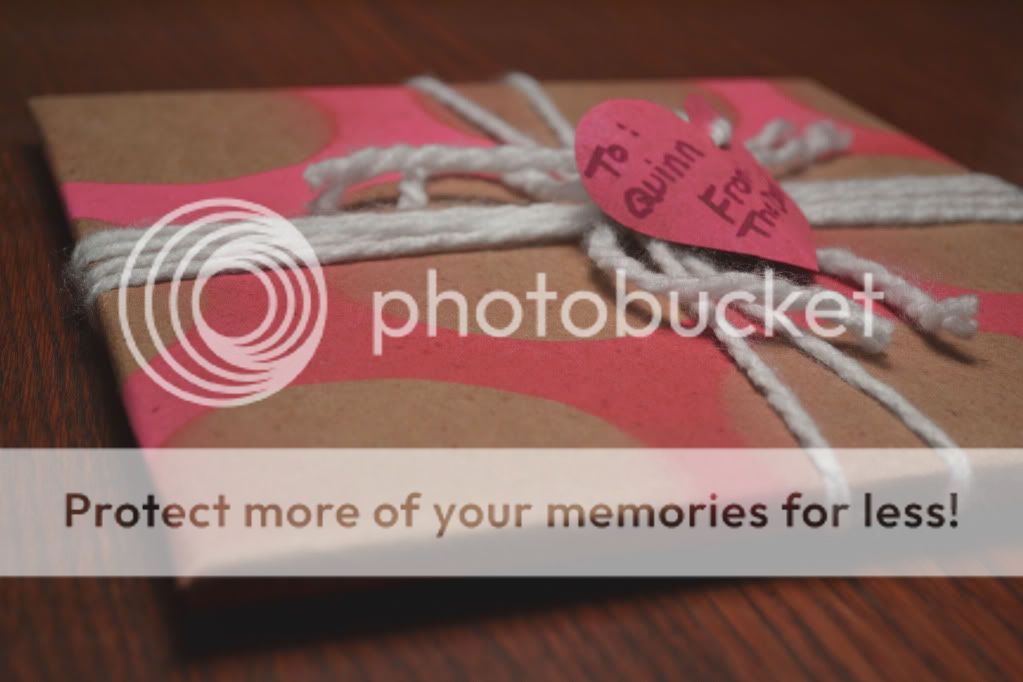
Voila…instantly personalized! I even used one of the circles to make a little heart label but after Heather’s post yesterday I will be using one of these!
Cost: $0. All products used were those that I had laying around the house!
Time: About 30 minutes. If I was to do this again I think I could move a bit faster. I wasn’t exactly sure what I was doing. 🙂
All in all….pretty cute, don’t ya think?
xoxo,